Four hilltops, one great neighborhood story. This San Francisco Four Peaks Tour takes you through Eureka Valley’s twists and lookouts, linking the Castro District with Tank Hill and Corona Heights. You’ll also get the fun, slightly odd details—secret staircases, hidden concrete slides, secluded gardens, and even a podium with a missing statue.
I especially like how the route mixes big city views with real street-level moments, not just “stand here and pose.” I also like the small-group feel (max 8), which makes it easier to ask questions and move at a human pace. The main drawback is the steady hill walking—bring proper hiking shoes, because the streets here are steeper than they look on a map.
In This Review
- Key Things I’d Book Again
- Four Peaks Tour: Eureka Valley Is the Real Star
- Start at Castro and Get Oriented Fast (Because This Area Is Tricky)
- Tank Hill Views: Where the City Suddenly Makes Sense
- Corona Heights and Randall Museum: A High-Point Finish
- The Streets Tell the Story: 1850s to Irish Churches to 1970s Life
- Secret Staircases, Hidden Slides, and the “Wait, What Is That?” Moments
- Group Size, Guide Style, and Why You’ll Actually Get Answers
- Snack Stop at Hot Cookie: Plan for Purchase, Not Included
- Price and Value: Why $65 Can Make Sense for Four Peaks
- What to Wear and How to Pace Yourself on Hill Streets
- Who This Tour Fits Best
- Should You Book the San Francisco Four Peaks Tour?
- FAQ
- How long is the San Francisco Four Peaks Tour?
- Where does the tour start and end?
- What is the group size?
- Is admission included for the stops?
- Are snacks included?
- Is the tour weather-dependent?
Key Things I’d Book Again
- Four peaks in Eureka Valley, not a “drive-by photo stop” route
- Tank Hill delivers some of the clearest, best views in the walk
- Secret staircases, hidden slides, and odd details you’d miss alone
- Eureka Valley history you can see in the streets and landmarks
- A finish at Randall Museum on Corona Heights
- Small group size (up to 8) and a guide with energy
Four Peaks Tour: Eureka Valley Is the Real Star
San Francisco has plenty of famous viewpoints. This tour is different because it treats Eureka Valley like the destination, not just a corridor between attractions.
The neighborhood you’ll move through spans the Castro District, Twin Peaks area, Corona Heights, and Dolores Heights. That matters because each elevation gives you a new angle on the city—both visually and historically. You’re walking the same kind of terrain that shaped daily life here long before the current mix of shops, homes, and visitors.
You can also read our reviews of more tours and experiences in San Francisco.


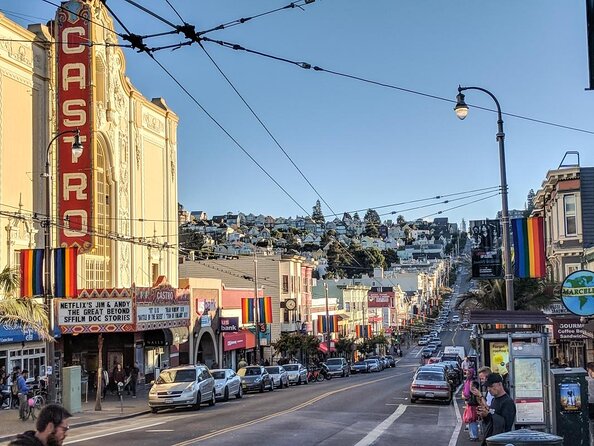
Start at Castro and Get Oriented Fast (Because This Area Is Tricky)
The tour kicks off at Castro St & Market St, and it loops back to that same meeting point at the end. That round-trip setup is helpful if you want an easy plan before or after dinner, and it also keeps the logistics simple.
From the start, you’re in the middle of the Castro’s energy. Then you start climbing away from the main drag and into the hills that overlook everything. The best part is that you’re not rushed through the first section—you get time to settle in and understand what you’re looking at, including how the surrounding hills frame the neighborhood.
A practical tip: if you’re sensitive to hills, go slow in the first 10–15 minutes. Once your breathing settles, the rest of the hike feels more “steady effort” than “sudden shock.”
Tank Hill Views: Where the City Suddenly Makes Sense
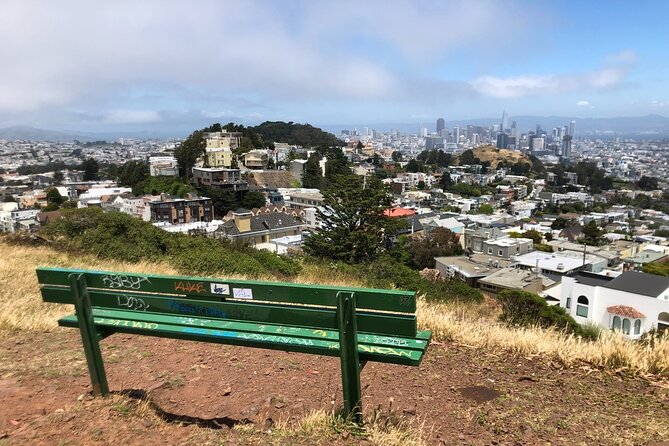
Tank Hill is the standout second stop, with a focused window (about 40 minutes) designed for views. This is where the city starts to feel big in a way that’s hard to get from street level.
You’ll get perspective on how neighborhoods stack behind each other—then how the skyline and bayside direction fit into the picture. Even if you’ve been to San Francisco before, this viewpoint angle tends to feel fresh because you’re high within the Eureka Valley story, not just high above it.
If you’re the type who likes photos, bring your phone battery gear and set yourself up early. The walk up is part of the experience, but your best shots happen during the time you’re standing and looking—so use that window for wide angles, not just close-ups.
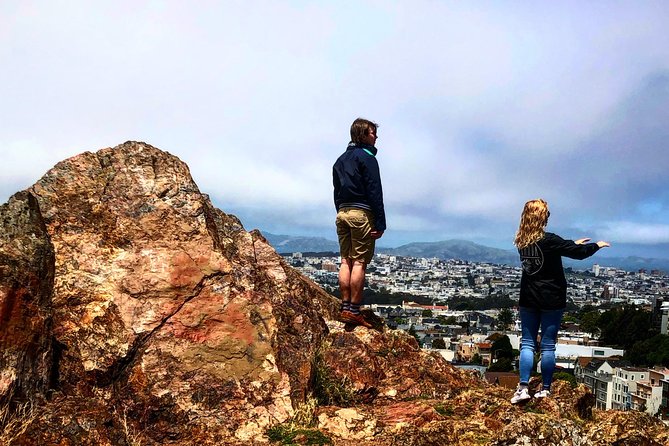
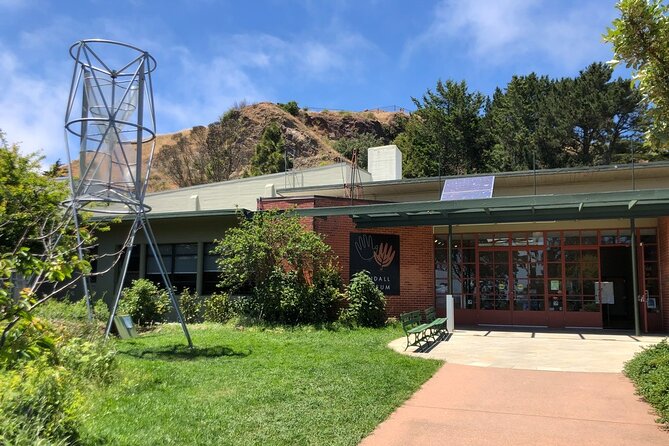
Corona Heights and Randall Museum: A High-Point Finish
Corona Heights is where the tour shifts from “look at the city” to “look at the neighborhood details.” The stop is about 40 minutes, and it sits in a stretch of ground that connects Buena Vista Park area down toward Eureka Valley.
This area matters for more than scenery. You’ll hear how streets here were shaped by the old hill layout and how the terrain connects the viewpoints. In practical terms: this is also where your legs will start to feel the earlier climbs, so pace yourself and take the slower steps if needed.
The tour ends at Randall Museum at the peak of Corona Heights. Even if you don’t plan to go inside, the finish point is a smart choice—ending at a known landmark gives you a clear “wrap” to the walk and an easy place to regroup before heading back.
The Streets Tell the Story: 1850s to Irish Churches to 1970s Life
One reason I like this tour is that the history isn’t shoved into a lecture. It’s pointed out through the physical neighborhood: what’s where, why it looks the way it does, and what that says about how people lived.
You’ll hear how Eureka Valley was once considered the outskirts—before the city filled in—when the Market Street edge was closer to open grazing land. Then the story moves forward into the 1890s Irish community, including churches that shaped neighborhood identity in that era.
Then comes the more recent neighborhood transformation. You’ll learn about streets that were abandoned in the 1960s and later brought back to life in the 1970s as the gay community flourished. That’s one of the tour’s strengths: it links social change to the streets you’re walking on today.
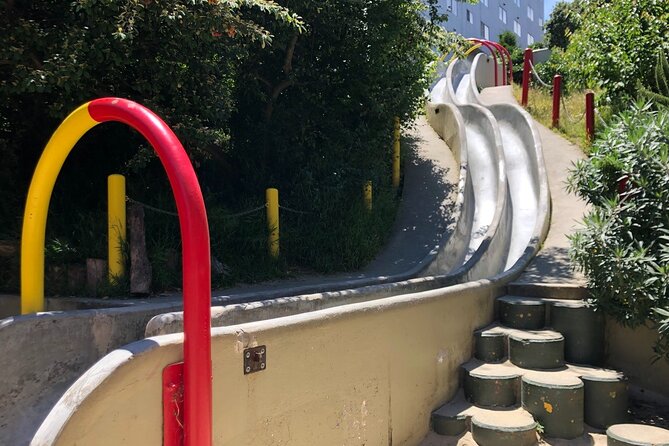
And yes, you also get the quirky physical reminders—like hidden staircases and concrete slides. Those details aren’t random. They help you picture how movement through this steep terrain evolved over time.


Secret Staircases, Hidden Slides, and the “Wait, What Is That?” Moments
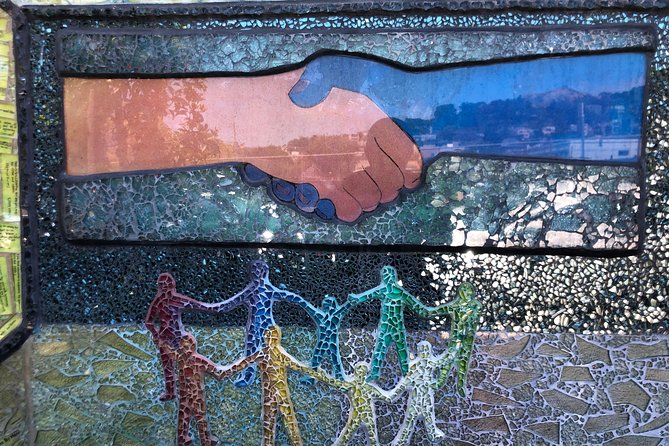
This is where the Four Peaks Tour feels playful and real. The route includes secret staircases and hidden concrete slides, plus secluded gardens you wouldn’t spot from the street.
There’s also a stop for a certain podium with a missing statue. That kind of small oddity is exactly why I like guided walks: it turns your attention from the obvious to the overlooked. You start noticing what’s still there, what’s changed, and what the neighborhood left behind.
Just know: these moments still fit into an active hike. If you’re expecting a gentle stroll where you stop for long chats every few minutes, you may need to adjust your expectations. The fun comes as part of the movement, not in place of it.
Group Size, Guide Style, and Why You’ll Actually Get Answers
The tour caps at 8 travelers, and that small number really changes the feel. It’s easier for the guide to watch your pace, steer you to the best view angles, and answer questions without everyone shouting over everyone else.
In the strongest examples, the guide experience is high-energy and story-driven. One highly praised guide named Ryan earned repeat compliments for enthusiasm, friendliness, and real local knowledge about the hills and neighborhood layers.
Even if you don’t get the exact same guide, the format here is clearly built for a personable, explanation-rich walk. You’ll likely come away with the sense that you saw more than the standard viewpoints and that you understand how this area works.
Snack Stop at Hot Cookie: Plan for Purchase, Not Included
Food on this tour is simple: there’s a snack stop at the Hot Cookie, and snacks are available for purchase. That means the tour isn’t built around meals, but it gives you a chance to fuel up during the hike.
I’d treat it as an optional sweet break, not a guaranteed dinner plan. If you’re particular about dietary needs, keep a backup snack with you. The tour doesn’t list snacks as included, so don’t assume anything will be provided.
Price and Value: Why $65 Can Make Sense for Four Peaks
At $65 for about 3–4 hours, this tour is priced like a guided city hike rather than a low-cost walking tour.
So is it worth it? For me, the value hinges on two things:
1) You’re paying for guidance that brings out the “how” and “why,” not just the “where.” The history points, the unusual structures, and the multiple lookouts add up to more than a simple stroll.
2) You get four peak perspectives across the Eureka Valley area, plus a finish at Randall Museum. The time window is long enough to feel like a real experience, but not so long that it eats your whole day.
If you’re someone who likes viewpoints and wants a guide to interpret what you’re seeing, $65 can be a fair deal. If you mainly want a casual photo walk and don’t care about neighborhood explanations, you might prefer free options on your own.
What to Wear and How to Pace Yourself on Hill Streets
The tour is listed for moderate physical fitness, and the instruction is clear: wear hiking shoes. These hills are the kind that punish slick soles and bad laces.
I’d also plan for weather changes. San Francisco can go from cool to breezy fast, and the hills can feel more exposed when you hit open viewpoints. Bring a layer you’ll actually wear once you stop for photos.
Water helps. The walk is only a few hours, but you’ll be climbing and pausing in sun or wind depending on the day. If you get lightheaded easily, take the first climbs slower than you think you need.
Who This Tour Fits Best
This tour is a great match if you want:
- Views that connect to neighborhood story, not just a skyline photo
- A guided route through Eureka Valley’s hills and lesser-seen spots
- A manageable active outing with a small group
- A finish near Randall Museum so you have an easy place to end your day
It’s also a good fit for couples, solo walkers, and groups who enjoy learning while walking.
If you have very limited mobility or you struggle with steep streets, consider another option. The tour is moderate, but it’s still a hill route with stair elements.
Should You Book the San Francisco Four Peaks Tour?
If you like guided walks that mix street-level history with legit viewpoints, I think you’ll enjoy this. The standout strengths are the Tank Hill views, the multiple lookouts across Eureka Valley, and the small-group pace that keeps the experience from feeling like a rushing conveyor belt.
One caution: balance the good operational record with real-world risk. There has been at least one report of a late cancellation tied to child care, which is the kind of thing that can sting if your schedule is tight. If you can build in a buffer day or two, booking feels much safer.
Overall, this is one of the more interesting ways to experience San Francisco’s hills because it focuses on a neighborhood with a story—and it gives you four perspectives instead of one.
FAQ
How long is the San Francisco Four Peaks Tour?
The tour runs about 3 to 4 hours.
Where does the tour start and end?
It starts at Castro St & Market St and ends back at the same meeting point.
What is the group size?
The tour has a maximum of 8 travelers.
Is admission included for the stops?
The listed stops are marked ticket free, and the tour includes all fees and taxes. The tour ends at Randall Museum, but the info provided does not confirm whether any museum entry fee is included.
Are snacks included?
No. Snacks are not included, but you can purchase snacks at local favorites, including a stop at Hot Cookie.
Is the tour weather-dependent?
Yes. It requires good weather. If it’s canceled due to poor weather, you’ll be offered a different date or a full refund. Service animals are allowed, and the tour is near public transportation.