REVIEW · SAN FRANCISCO
San Francisco Indoor Skydiving with 2 Flights & Personalized Certificate
Book on Viator →Operated by iFLY Indoor Skydiving · Bookable on Viator
This wind tunnel turns nerves into flight.
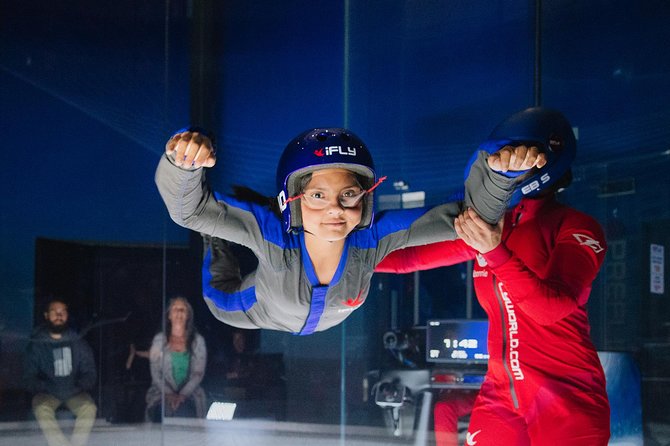
At iFLY San Francisco Bay, you get a short, hands-on lesson and then two 60-second free-fall flights inside an 800-horsepower vertical wind tunnel, so you’re flying without jumping from a plane. I especially like how the staff keeps things friendly and structured, with the instructor right there the whole time.
The other thing I really like: you fly one-on-one during each run, so you’re not stuck watching other people or guessing what to do. One consideration before you book: there are health and weight limits (no flying over 300 lbs, and extra evaluation if you’re 260–300 lbs), plus certain medical conditions and pregnancy mean you won’t be able to participate.
In This Review
- Key highlights worth knowing before you go
- The “real flight” feeling without the plane
- The 75-minute flow from check-in to take-home certificate
- Training with an accredited instructor: the part that makes you fly well
- Two flights in the wind tunnel: how to get the most out of both
- A quick mindset tip
- Safety and who can’t fly (so you don’t waste time)
- Gear, clothes, and the small prep that makes it easier
- Where this session shines: who will love it (and who might not)
- Price and value: what $125 really buys
- Quick logistics you should plan for
- Should you book iFLY San Francisco wind-tunnel flight?
- FAQ
- How long is the full San Francisco iFLY experience?
- Do I need experience to fly inside the wind tunnel?
- How many flights do I get, and how long is each one?
- How big are the groups, and do you fly one at a time?
- What age and weight limits are there?
- What should I wear for the flight?
Key highlights worth knowing before you go
- Two flights in the chamber, each for 60 seconds, with instructor coaching the entire time
- Wall-to-wall airflow that helps you stay “floating” instead of falling
- A smooth speed build-up as the tunnel operator raises wind speed gradually
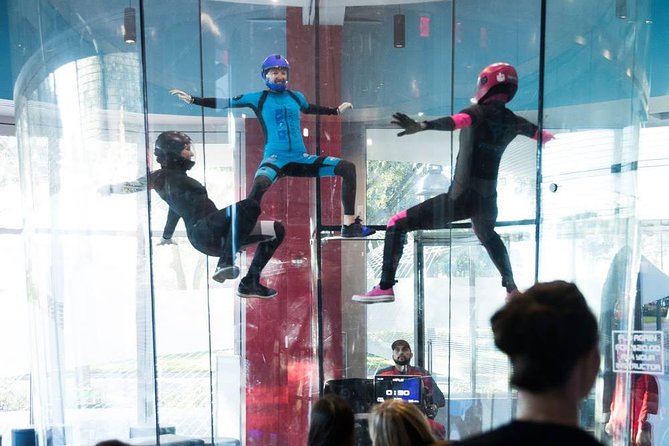
- Up to six people flying per session, but you still get one-on-one time in the chamber
- Personalized flight certificate you can take home
- You can watch from the observation area if friends or family want to come along
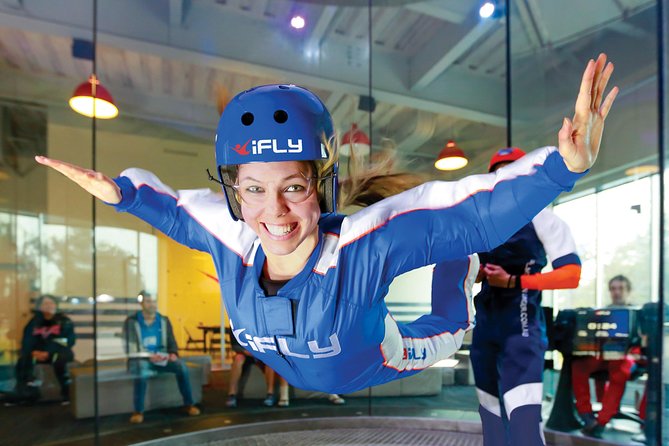
The “real flight” feeling without the plane
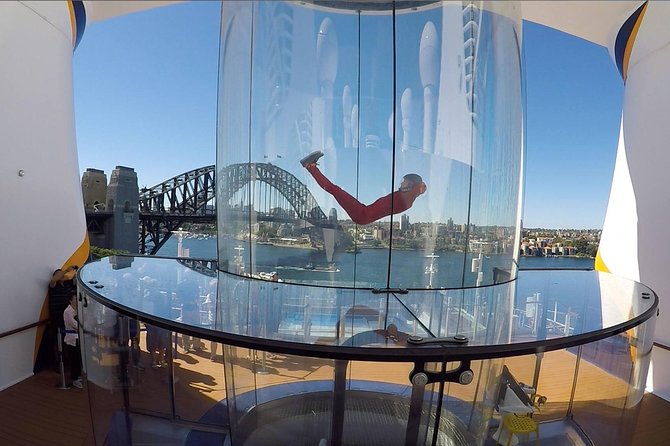
San Francisco indoor wind-tunnel flight at iFLY has a way of tricking your brain—in a good way. You still get that face-in-the-wind adrenaline, but there’s no exit door, no drop, and no chaotic freefall scramble. The trick is the chamber’s airflow: it’s built to hold you up with a steady column of air, so you can focus on body position instead of panic.
I also like that it’s designed for first-timers. You don’t need prior experience. Before anyone goes airborne, you’ll do specialized training with an accredited instructor so you know how to hold your body and what to listen for once the fans ramp up.
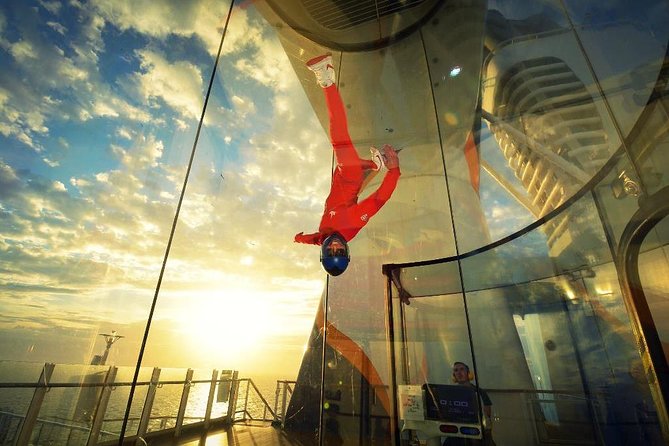
And yes, the speed sounds intense on paper: the wind speeds can reach about 130 to 175 mph (209 to 282 kph). In practice, you feel the rush, then the instructor helps you stay in control of your posture through it all.
You can also read our reviews of more tours and experiences in San Francisco.


The 75-minute flow from check-in to take-home certificate
The whole experience runs about 1 hour 15 minutes from start to finish. In that time, you’ll go from gear-up to training to two separate flight attempts, then wrap up with your achievement certificate.
Here’s the rhythm you should expect:
- You arrive and get suited up with the gear.
- You take part in a training session with your instructor so you understand the flying position and signals.
- You do your first 60-second tunnel flight.
- You repeat the tunnel process for your second 60-second flight, often with a chance to push a bit more depending on comfort.
The certificate matters more than you might think. It turns a one-time thrill into something tangible. When you’re done, you leave with proof you flew—plus a little reminder of the exact experience length and what you learned in training.
One practical note: food and drinks aren’t included. Plan to eat before you go, or grab something after, so you’re not hungry while you’re waiting between steps.
Training with an accredited instructor: the part that makes you fly well
This is not a “hop in and hope” setup. The experience includes a specialized training session from an expert flight instructor, and you’ll practice the basic body position before your first run.
What makes this valuable is that wind-tunnel flight is mostly about control and comfort. Your instructor teaches you how to move into the stable posture that lets you stay in the airflow column. In the chamber, the tunnel operator slowly increases wind speed until you and your instructor are airborne, so you get a ramp-up rather than a sudden shock.
In the training, you’ll also learn how to communicate through the process. Instructors are trained to spot you safely using your flight suit handles, which is why you wear the suit during the session. That might sound technical, but the payoff is simple: you feel safer because the guidance is built into the system.
You may even notice a difference between your first and second flights just from how quickly you start trusting the airflow. Many people find that the second run feels more fun because your body stops fighting the experience.
Two flights in the wind tunnel: how to get the most out of both
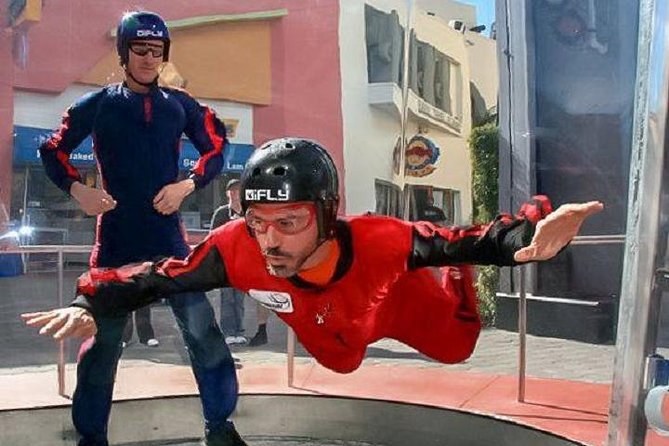
You get two flights, and each one is 60 seconds inside the chamber. That’s a smart design for first-timers. The first flight is your baseline: you learn how your body reacts, you get used to the sound and pressure, and you understand how the instructor positions you.
Then comes flight number two, where you can usually have more fun with the performance side. One helpful detail from past participants: there’s often a choice about whether you want to go “super high” or keep it more controlled. If you’re chasing maximum thrill, ask your instructor how you can steer your intensity level for the second flight based on your comfort.
Also, because sessions include a small group size, you won’t feel like you’re lost in a huge crowd. The session may include up to 12 people, but you’ll fly one at a time in the chamber with one-on-one attention. You’re not sharing the flight space with multiple flyers.
A quick mindset tip
Go in ready to learn body position, not ready to “perform” right away. You’ll have more fun on flight two if you let flight one be your practice run.


Safety and who can’t fly (so you don’t waste time)
This experience is built for safety, and the instructor is with you the entire time. Still, iFLY has firm rules.
You won’t be able to fly if you have previous neck, back, heart, injuries, or shoulder dislocations, are pregnant, or are wearing a hard cast. Age is also part of eligibility: the minimum age is 3 years. If you’re under 18, a parent or guardian must sign your waiver.
Weight rules matter too:
- You must weigh less than 300 lbs.
- If you’re between 260 and 300 lbs, iFLY may not be able to accommodate you. You’ll need additional evaluation during check-in, and extra restrictions could apply.
If you’re anywhere near those thresholds, plan to ask questions early. It’s better to confirm before you drive than to show up and get turned away.
Gear, clothes, and the small prep that makes it easier
The staff provides the flight gear, but you control what goes on your body before you suit up.
What to wear:
- Well-fitting, lace-up sneakers or running shoes
- Comfortable clothes, preferably pants and a shirt without a collar
Your flight suit goes on top of your clothes. If you have long hair, you should braid it and keep it in a low bun. This keeps it from whipping around during flight.
Eyeglasses are allowed. There are larger goggles available to fit over glasses. That’s a relief if you hate contact lenses.
Take off items that could flap or loosen: jewelry like earrings, necklaces, bracelets, watches, rings, and hair accessories. Empty your pockets too. Lockers are available, but the best move is still leaving valuables at home.
If you’re the type who likes to overpack, resist it. You want to arrive with fewer loose items and more comfort.
Where this session shines: who will love it (and who might not)
This setup is great for people who want the thrill of flight but prefer training wheels. If you’re celebrating a birthday or just want a memorable group activity without complicated planning, the vibe is supportive and structured.
In particular, it works well for:
- First-time thrill seekers who don’t want plane anxiety
- Families with kids age 3+ (with required waiver signatures for minors)
- People who like clear instruction and hands-on coaching
- Older adults who want a safe-feeling, guided experience (some past flyers included seniors and said the crew made them feel special)
It might be less ideal if:
- You know you’ll struggle with the physical restrictions (neck/back/heart issues, shoulder dislocation history, pregnancy, hard cast)
- You’re near the weight limit and don’t want potential delays at check-in
- You’re expecting a DIY “fly however you want” situation. You can move and learn, but the instructor-led approach drives what’s possible early on.
Also, if you have friends or family coming along, they can watch you from an observation area. That lets you share the moment without forcing everyone into gear-up time.
Price and value: what $125 really buys
At $125 per person, you’re paying for a complete package, not just time in the tunnel. What’s included is training, gear, one-on-one guidance, two flights, and the flight certificate, plus taxes and handling.
For many people, the value is in the “two-run” structure. You’re not paying for a single short attempt. You get a first flight that teaches your body what to do, then a second flight to enjoy what you learned.
You also get experienced instruction rather than guesswork. With a certified instructor right there, you spend your energy learning the right posture instead of trying to figure it out mid-air.
Is it cheap? No. But for the amount of guided time and the fact you’re flying twice inside a professional wind tunnel, it tends to feel like a fair trade for a high-impact experience.
Quick logistics you should plan for
This is centered at iFLY San Francisco Bay in Union City at 31310 Alvarado-Niles Rd. Hotel pickup and drop-off aren’t included, so you’ll want to arrange your own transportation.
Plan to arrive early. You’ll want buffer time for check-in and gear prep. The experience begins promptly on schedule once your session starts.
Finally, booking is streamlined. You get a confirmation at the time of booking and a mobile ticket.
Should you book iFLY San Francisco wind-tunnel flight?
If you want a first-time, guided way to feel like a flyer, I think booking makes sense. The big reasons are the two guided flights, the accredited instructor coaching, and the safety structure that keeps you “floating” instead of jumping.
Before you go, do two quick checks:
- Make sure you fit the health and weight rules (especially if you’re between 260–300 lbs).
- Plan what you’ll wear and bring so you’re ready to suit up without last-minute stress.
If that checks out, you’ll likely walk away with more than a thrill. You’ll leave with a skill you understand better each minute you’re in the chamber—and a personalized certificate that actually feels worth keeping.
FAQ
How long is the full San Francisco iFLY experience?
It takes about 1 hour and 15 minutes (approx.) from start to finish, including training and both wind-tunnel flights.
Do I need experience to fly inside the wind tunnel?
No experience is necessary. You’ll be required to take a training class first-time flyers, including important guidance and pre-flight practice of your flying position.
How many flights do I get, and how long is each one?
Your session includes two flights for one person, and each flight lasts 60 seconds inside the wind tunnel.
How big are the groups, and do you fly one at a time?
Sessions can include up to 12 people, but you fly one at a time in the flight chamber with one-on-one guidance from your certified instructor.
What age and weight limits are there?
The minimum age is 3 years. You must weigh less than 300 lbs. If you weigh between 260 and 300 lbs, you may not be able to fly and will need additional evaluation during check-in.
What should I wear for the flight?
Wear well-fitting lace-up sneakers or running shoes and comfortable clothes, preferably pants and a shirt without a collar. Remove jewelry and items that might flap, and braid long hair into a low bun. Lockers are available for belongings.